
In October, we had a vacancy in our Victorian four-unit, Lady Crescent. Fast forward to January and I’m finally ready to reveal what we did with the space.
Let me preface, it’s not that we needed three months to hit the refresh button, it’s just that is what it ended up taking us. Three months and looootttttsss of money later – you’ve heard it said that renovations add up. They definitely add up (see cost breakdown at the bottom of this post).
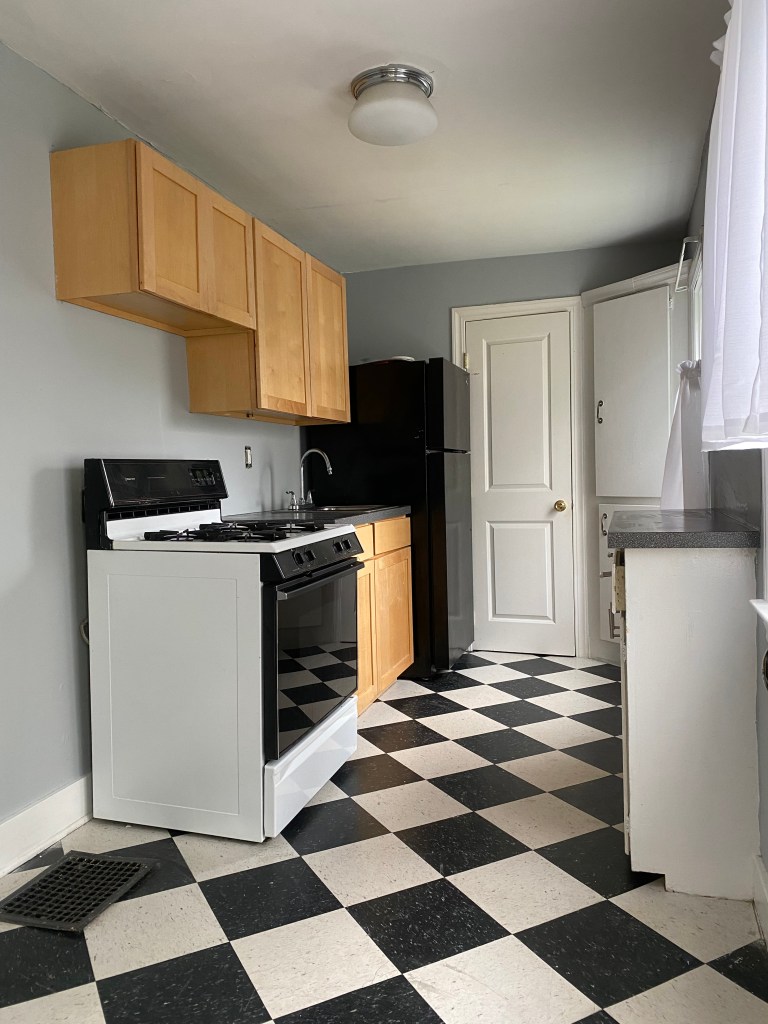
Let’s address the obvious question: why we would reno and furnish a rental? The building is located adjacent to GR’s Medical Mile – a stretch of hospitals, medical schools and research facilities. As such, we’ve found there’s a market for traveling professionals looking for furnished spaces to rent for a few months. Below is a before and after photo collection of the unit prepared for short term guests (30 days or longer). We’ll start in the heart of the home… the kitchen.
The floor was about the only thing I liked in the space, unless we’re counting the South facing windows. Lucky for me (the aesthetically motivated) and unlucky for Simeon (the savings $$ motivated), the clunky black fridge was on the fritz and needed to be replaced. The counter space was niltch and we wanted to create a seating area. Also, the bandwagon for open shelving has been jumped aboard (by me). Without further ado, the BEFORE and AFTER: can you spot what’s new?
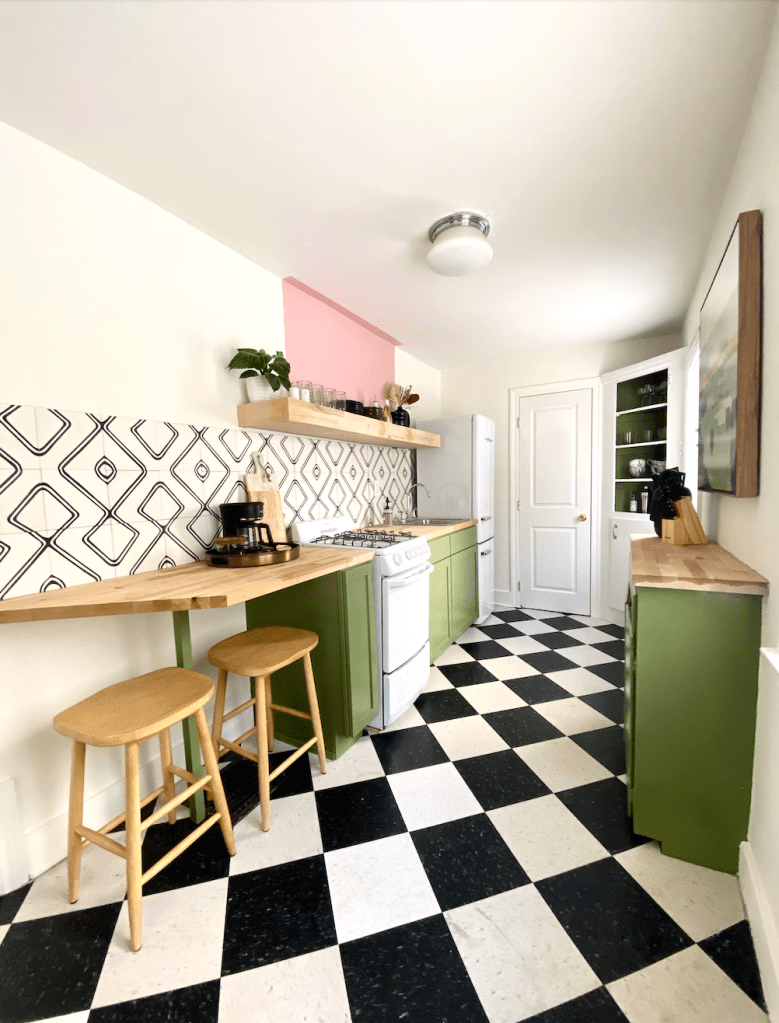
To maximize counter space and add seating, we swapped the old laminate countertop for butcher block and ran it along the entire wall. There is a heating vent, which prevents cabinets from being put along that wall – but it works perfect for counter seating. I also opted for a 20″ apartment size oven over the traditional 30″, which added nearly a foot of counter space. Simeon worked his magic and threw together a floating shelf (for real, he’s so capable it’s stupid) and I removed the cabinet door on the top of the hutch and painted the inside to match the green cabinets. The one outstanding task? You guessed it – a new light fixture. My lone to-do item…will it ever be accomplished?

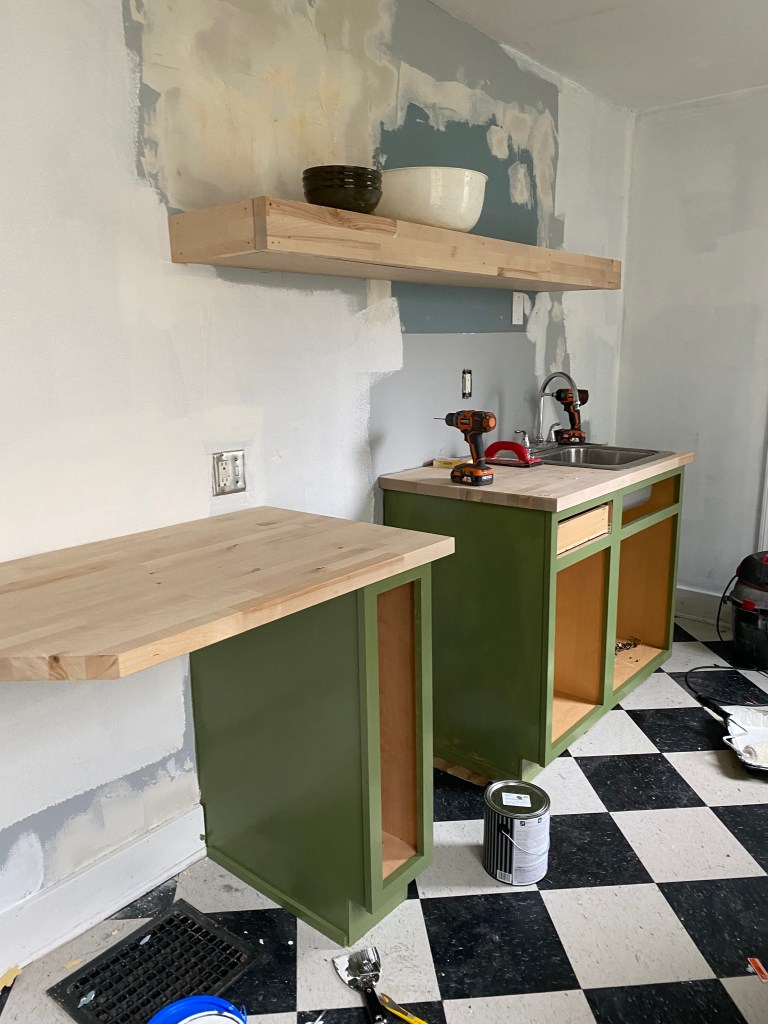

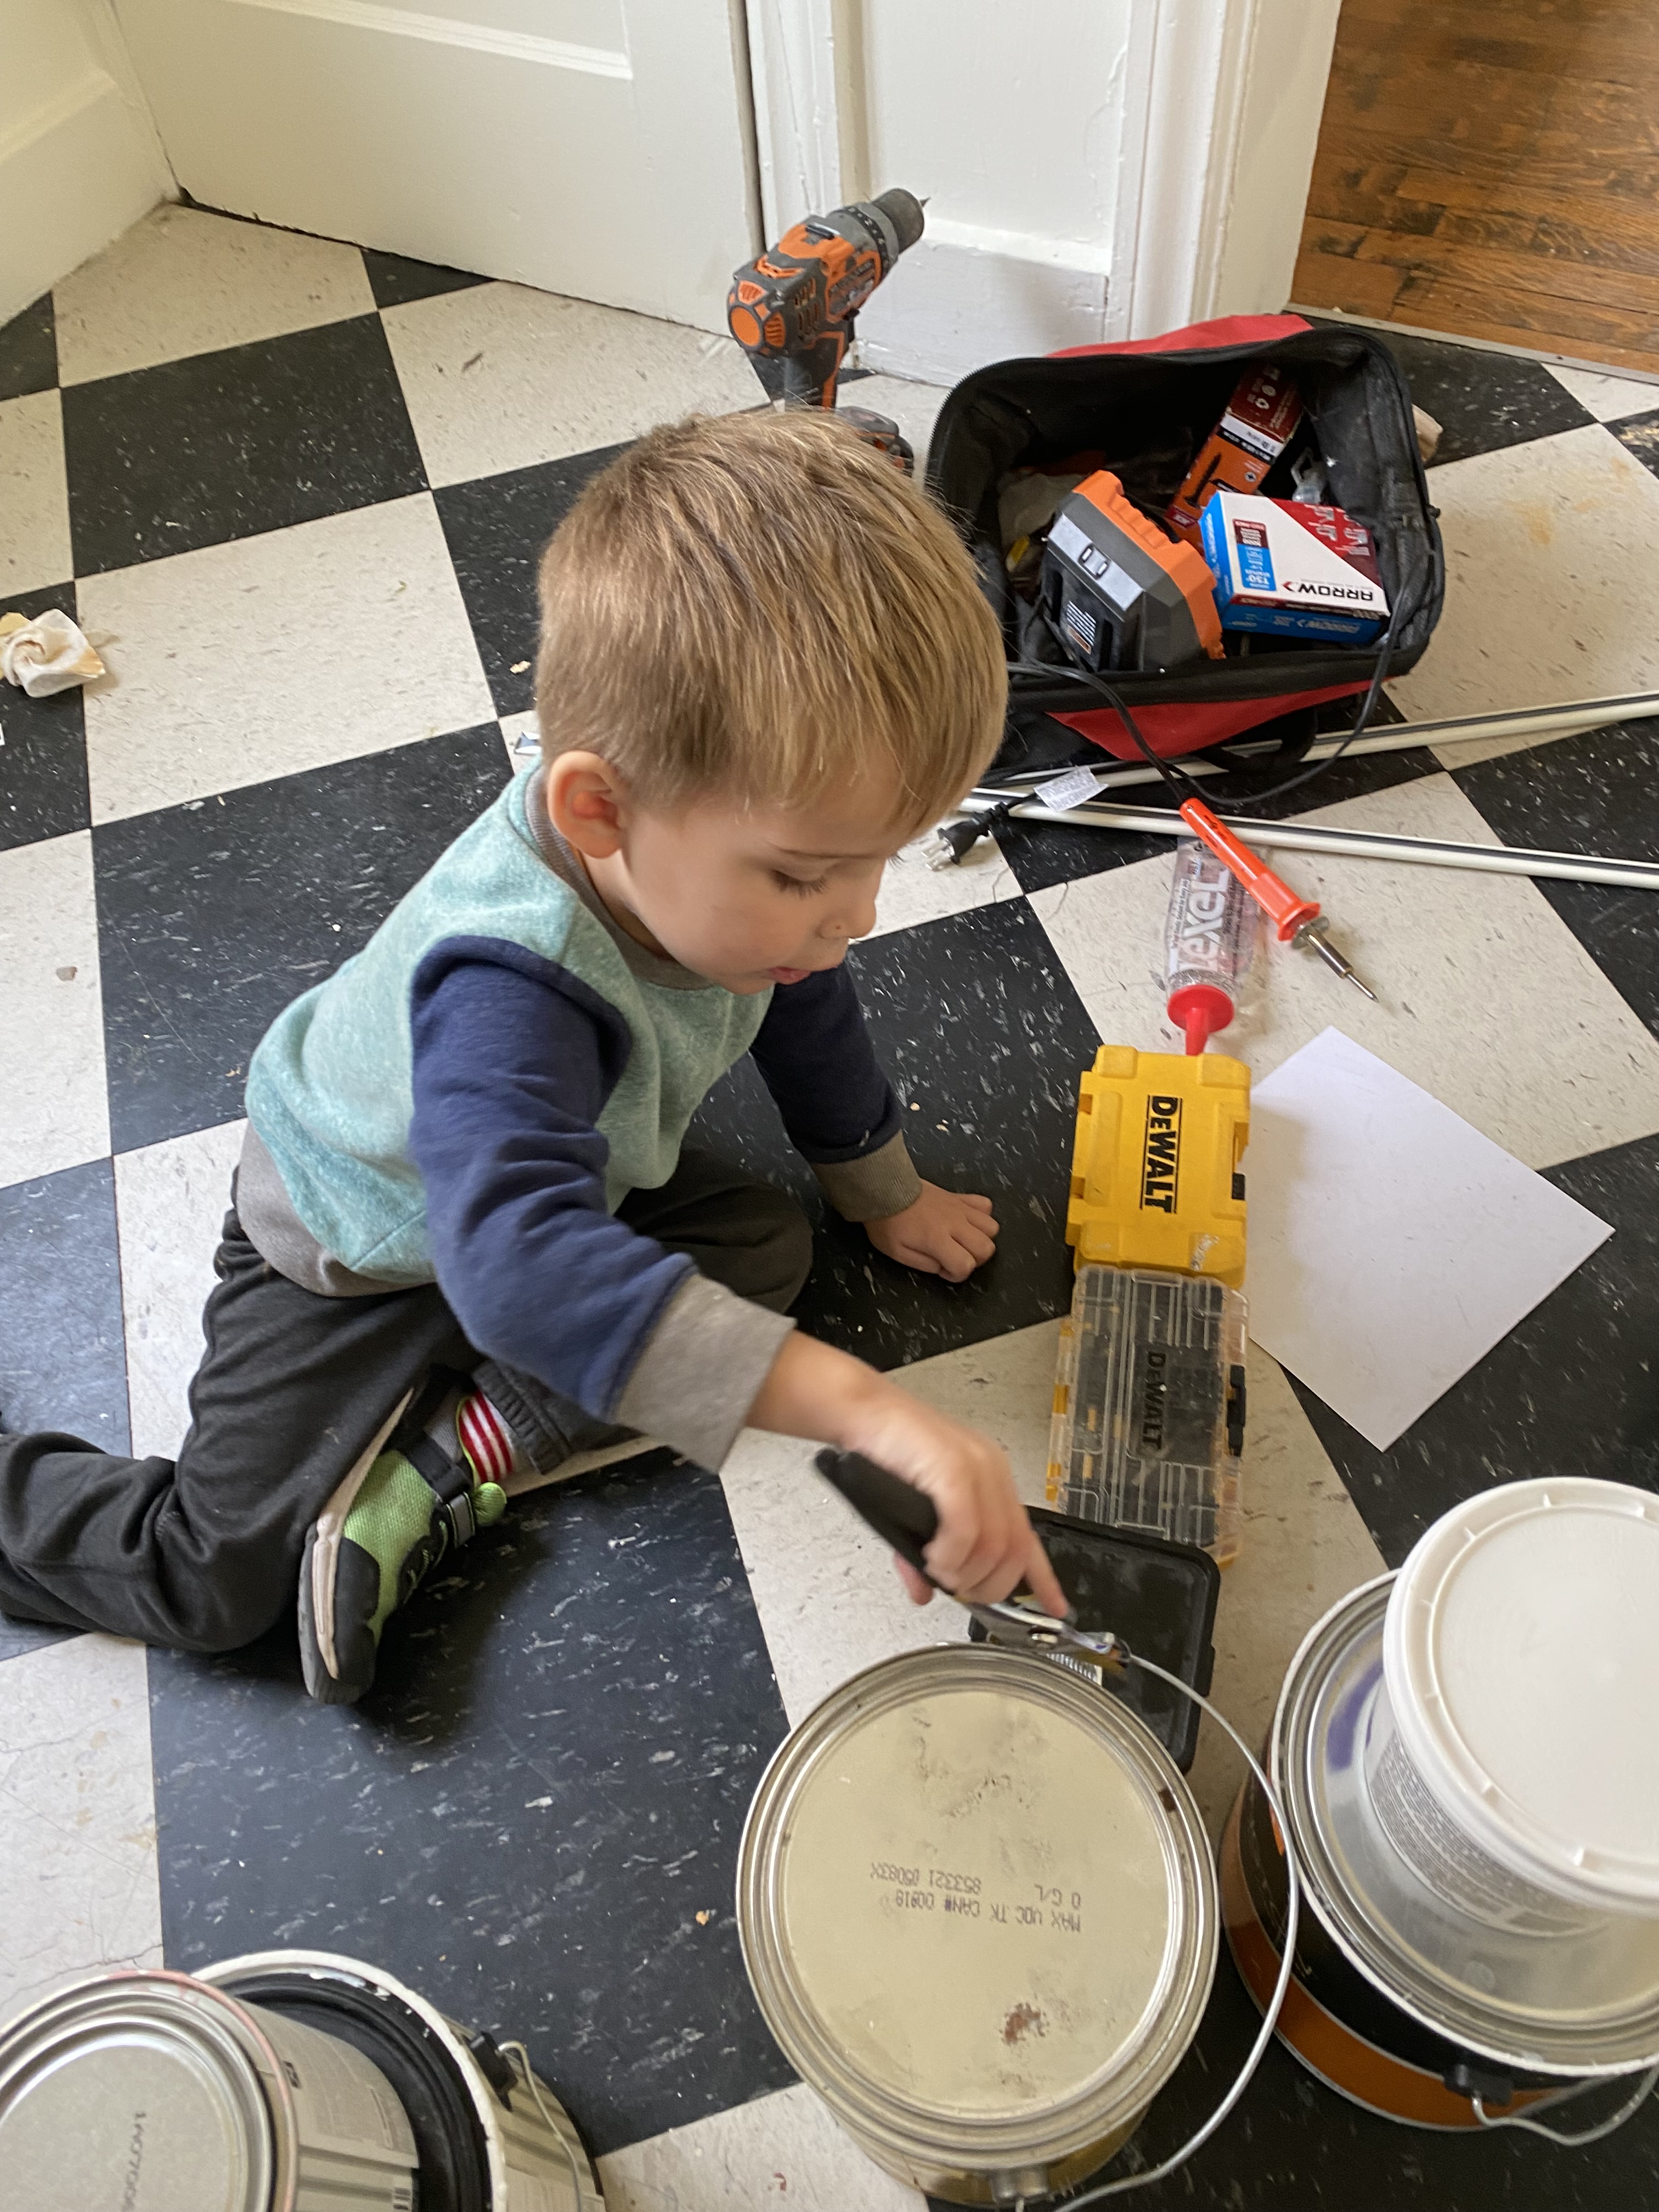
Enjoy the few process photos, including images of the child labor. Which in all honesty, I get why employing small children is frowned upon. This kid went on strike after 20 minutes and spilled the entire pint of pink paint over the floor.


Cost Breakdown:
I mentioned above that we spent a lot of money, which — in the scene of home projects is relative. For anyone curious what it cost, here’s the breakdown for the kitchen refresh:
Refresh Cost breakdown:
Backsplash tile from Etsy: $528.32
Butcher block counters from Menards: $368 (144″ L x 25″ D)
Replacement vinyl floor tiles from Lowes: $6.90 (for 10)
Paint; wall, cabinet and accent: $117.47
Retro Fridge: $1,299 (bought it here)
20″ oven via Facebook Marketplace: $265.00
DIY floating shelf lumber: $60
Extra 9″ cabinet: $100 (discounted due to slight damage)
*The total doesn’t include our labor and basic materials, such as drywall mud, screws or equipment. It also doesn’t include kitchen wares or art.
Note I didn’t include the cost of dishes, art, cutting boards, etc. I shopped Home Goods, but I bet Goodwill and other second hand stores would have everything needed for a basic kitchen. We also added a retro-looking microwave and coffee maker, etc. (not pictured, as most of it’s housed in the little walk-in pantry).
Next up I’ll share the bedroom – which is my favorite room.

Leave a comment